Faceless YouTube AI Video Generator: Workflow Guide
Faceless YouTube channels can be genuinely useful, entertaining, and distinctive without putting a creator on camera. The hard part is not hiding the presenter; it is building a repeatable production system that gives every video a clear idea, readable visuals, a consistent voice, and a reason to keep watching.
An AI video generator can speed up the visual-production stage. Use it to create b-roll, explainer scenes, product visuals, or stylized transitions, then combine those assets with a script, narration, captions, and an editing pass. This guide explains how to build that workflow with PixVerse text-to-video and image-to-video.
What Is a Faceless YouTube Video?
A faceless YouTube video communicates through narration, captions, screen recordings, animation, generated visuals, product footage, or licensed clips instead of an on-camera host. It can work for tutorials, explainers, history videos, reviews, visual essays, product stories, and educational series.
The format does not remove the need for a point of view. A successful faceless channel still needs a recognizable editorial angle: the questions it answers, the visual language it uses, and the audience it serves. AI helps create visual assets, but the creator still owns the research, script, review, and publishing decisions.
Why Use an AI Video Generator for Faceless YouTube Content?
Traditional video production can make a simple idea feel expensive or slow. A creator may need a location, camera, lighting, talent, b-roll, and an editor before reaching the first draft. AI generation gives creators another route: describe the scene they need, generate several versions, and use the strongest clip in the final edit.
PixVerse is useful when a video needs original motion that stock footage cannot provide. You can begin with a written scene description, animate an approved reference image, choose a landscape or vertical composition, and iterate on a visual direction before moving into the edit.
AI does not replace the parts viewers notice most: a clear promise, accurate information, a natural narration, and pacing that rewards attention. Treat generated footage as production material, not as the whole workflow.
Build a Repeatable Faceless YouTube Workflow
The most sustainable workflow separates the work into stages. Each stage should have one job, so the channel can improve individual parts without rebuilding every video from scratch.
1. Choose a Topic with a Clear Viewer Need
Start with a question, problem, comparison, or transformation that a specific viewer would care about. Search suggestions, comments on related videos, community posts, and your own analytics can reveal the language people use when they want help.
Write a one-sentence promise before drafting the script. For example: “This video shows three ways a new creator can turn a product photo into a short ad without filming.” A promise like this keeps the title, opening, visuals, and ending focused on the same outcome.
2. Write the Hook and Script
The opening should make the value of the video obvious. Show the result, name the problem, or frame a question before spending time on background. Then build the script around a simple sequence:
- The hook and viewer benefit.
- The explanation, examples, or steps.
- A payoff that answers the original promise.
- A natural next action, such as watching a related guide or trying the workflow.
For a short explainer, write in compact spoken sentences and assign a visual beat to each sentence. This makes narration easier to record and prevents a common faceless-video problem: several lines of voiceover playing over one static image.
3. Plan the Visuals Before Generating
Create a shot list from the script. Label each beat as one of the following:
- A generated scene that needs a specific subject, action, or camera movement.
- An image-to-video shot that starts from a product photo, illustration, or approved frame.
- A screen recording, chart, diagram, or licensed asset.
- A title card, caption, or transition created in the editor.
This planning step keeps generation deliberate. Instead of asking one prompt to explain an entire topic, create short clips that each support one idea.
4. Generate Video Assets with PixVerse
Use PixVerse for text-to-video when you need a new scene, and image-to-video when a reference image should define the subject or composition. For YouTube, decide on the aspect ratio before generating so the camera framing fits the final edit.
A practical prompt describes the subject, setting, action, camera, lighting, and format. For example:
Video prompt: A creator’s desk with a laptop showing a video timeline, a product photo on a phone screen transforms into a polished moving ad, slow camera push-in, warm studio lighting, realistic materials, 16:9 landscape composition, subtle keyboard and room ambience.
Generate a few alternatives for any important opening or payoff shot. Review them at normal playback speed, then keep the version that supports the script most clearly. A visually impressive clip is not useful if it distracts from the narration or places the subject outside the intended crop.
5. Add Narration, Captions, and Sound
Narration gives a faceless video continuity. You can record your own voice, use a voice workflow that you have permission to use, or create a text-led visual essay with careful captions. Keep sentences short enough that viewers can understand them on the first listen.
Captions improve accessibility and help viewers who begin watching without sound. Position them away from important on-screen details, use a readable contrast, and time each line to the spoken idea rather than filling the screen with a full paragraph.
Use music and sound effects with the appropriate rights. Mix them below the narration, then review the finished video on phone speakers as well as headphones.
6. Edit for Retention and Clarity
Editing turns a collection of clips into a video with momentum. Cut when the visual task changes, not simply because a clip has ended. Use screen recordings or diagrams when a concept needs precision, and use generated motion when it makes the explanation more memorable.
Before export, check these basics:
- The first few seconds show the topic and payoff clearly.
- Every voiceover beat has a relevant visual.
- Captions, faces, and essential graphics remain visible on smaller screens.
- The title and thumbnail accurately represent the video.
- Any synthetic or altered content is disclosed where the platform requires it.
Faceless Video Formats That Work Well on YouTube
Different formats make different production choices easier. Choose the one that matches the topic instead of forcing every idea into the same template.
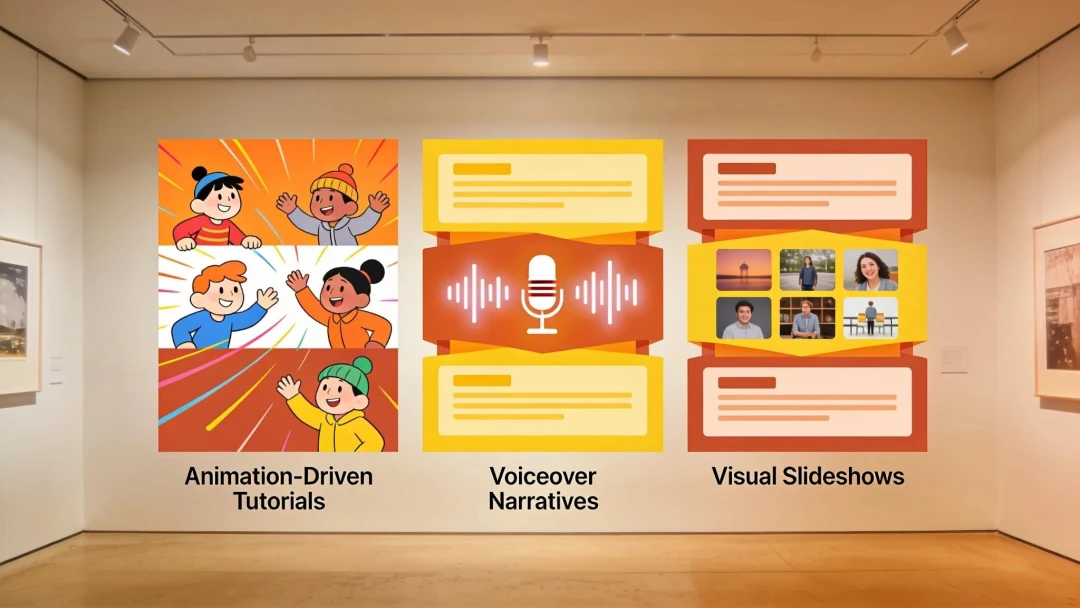
Animated Explainers
Animated explainers are useful for abstract topics, processes, and concepts that cannot be filmed easily. Use clear labels, visual metaphors, and short generated inserts to make the narration easier to follow.
Voiceover Stories and Visual Essays
A voiceover story combines a strong narrative with b-roll, generated scenes, archive material you have the right to use, and graphics. This format works when the script has a clear beginning, middle, and end.
Tutorials and Screen Recordings
Screen recordings are often the most trustworthy format for software how-tos. Combine the real interface with generated establishing shots or transitions only where they add context. Do not use generated visuals to suggest a product interface or result that the viewer cannot actually reproduce.
Product and Marketing Videos
When the starting point is a product image, image-to-video can create motion-led visuals for a review, concept video, or campaign test. Preserve the real product identity and verify every product claim in the final narration.
Measure What Improves the Channel
YouTube Analytics helps creators understand which ideas and production choices are working. Watch time, average view duration, audience retention, click-through rate, comments, and returning viewers each answer a different question.
Use retention data to find the moments where viewers leave. A drop near the opening may mean the title and hook do not align. A drop in the middle can indicate that the visual pace slowed down or the script delayed its payoff. Compare the strongest and weakest videos to identify one change to test in the next upload.
Avoid treating a single result as a verdict on the entire channel. A repeatable system improves through small experiments: a different opening structure, a clearer thumbnail, a tighter script, or a more useful visual example.
Keep Improving the Production System
The advantage of a faceless workflow is consistency. Save prompt structures, caption styles, intro patterns, music guidelines, and shot-list templates that fit your channel. Over time, those reusable decisions free up more attention for the topic and story.
Use AI video generation to make visual production faster, not to lower your editorial standard. When the script is accurate, the visuals are intentional, and the final video respects platform rules and audience expectations, a faceless channel can build real trust without relying on an on-camera host.
Related Resources
- YouTube Shorts AI Video Generator: Ideas, Tools, Workflow
- How to Make AI TikTok Videos: A Step-by-Step Guide
- PixVerse AI Platform Guide: How to Create and Automate Video Content
Official source: PixVerse.